How do I create my own power cable?
In this little tutorial we show how to create a 2×5 to 2×8 power cable for Eurorack synthesizer modular systems.
If you instead want to make a full width 2×8 to 2×8 cable, you need to have a 16 position ribbon cable and 2 pieces of 2×8 position IDC connectors instead.
Components
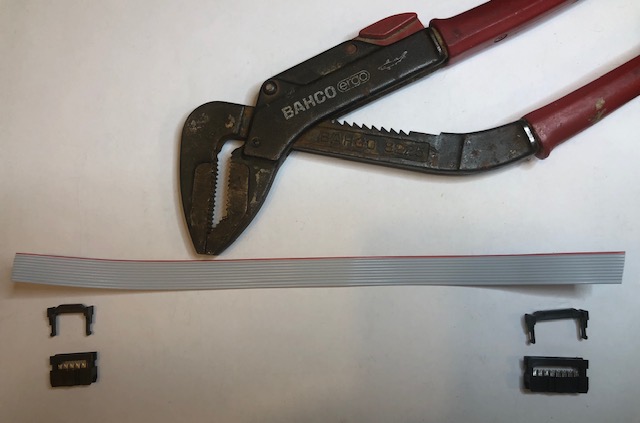
- IDC Female connector 2×8 position (with 2 plastic brackets)
- IDC Female connector 2×5 position (with 2 plastic brackets)
- Ribbon cable, 10 position, about 25 cm
Tools
You need a good multi grips pliers or similar. When you press the connectors through the ribbon cable, it’s best if it spans the whole connector width.
1. Press the small 2×5 connector
The connector has a plastic “tap” on one of the long sides. This must be oriented correctly. Stick the ribbon cable in the contact. The red marking should be to the left when you are facing the holes in the connector and the “tap” is on the top. See picture.

Before you press, make sure that the ribbon cable is aligned good in the connector. See picture.

NOTE! Be gentle while pressing! No force or violence here!
Now press the first plastic bracket closer to the connector with the pliers. The ribbon cable will be connected to the connector when you press. You will hear a little “click” on each side when the pressing is done.
You may need to move the pliers a few times to make the pressing with equal force for the whole connector width.

2. Mount the smaller final plastic bracket
Fold the ribbon cable over the connector and place the final plastic bracket on top. Use your hands, no tools here. Press the bracket until you hear a “click”. Pull the ribbon cable through to tighten it up. See pictures.


3. Press the bigger 2×8 connector
Same procedure as for the smaller connector.
Make sure to get the orientation of the red stripe and the “tap” on the connector correct.
NOTE! The cable only has 10 positions but the connector has 16. The ribbon cable will not fill out the whole width of the connector. 6 positions will remain empty.

When you press with the pliers, spread the force equally over the part where the ribbon cable is.

4. Mount the bigger final plastic bracket
Same procedure as for the smaller connector.

5. Testing your final result
Now when you have created the cable, you need to to test it before use.
Use a multimeter with “beep”-function and test the connection for each pin. You can use pins from a pinstrip, dupont cables or needles to stick into the connector holes.
Make sure all connections are ok and that there is no shorts between cables. Shorts can appear if you have aligned the cable badly.