MIDI Dongle DIY Kit
Product status: Ended

This is a DIY kit where you can build a MIDI dongle with an opto-coupler and four buffered outputs. You can build a MIDI dongle, exactly like the manikk pre-built one, or you can use it for other purposes.
You can for example use it for your own arduino-based projects. You can connect it to the arduino RX, TX, 5V and GND pins and start using MIDI directly. It has a 5 pin pinstrip (or female header) for the microcontroller connection.
The MIDI dongle is designed mainly as a MIDI add-on for some manikk modules. Only one MIDI cable is included in the package for both the pre-built and the kit-versions. See the connector list on the MIDI-page, if you want to change the connector type or buy more connectors.
The dongle has the following functions:
- Small footprint, only 20x18mm.
- 1 pinstrip for connection to a manikk module or microprocessor.
- 1 MIDI input with opto-coupler, sent to microprocessor RX and the MIDI THRU outputs.
- 1 MIDI OUT selectable between MIDI out from the microprocessor (TX) or an additional MIDI THRU from the MIDI input. Output A.
- 3 MIDI THRU outputs (from the MIDI in). Outputs B, C and D.
- 1 little hole for fastening the dongle in some way. Use a plastic stripe. No metal here because it may cause shortcircuits.
See here how to create a MIDI cable for the manikk MIDI Dongle.
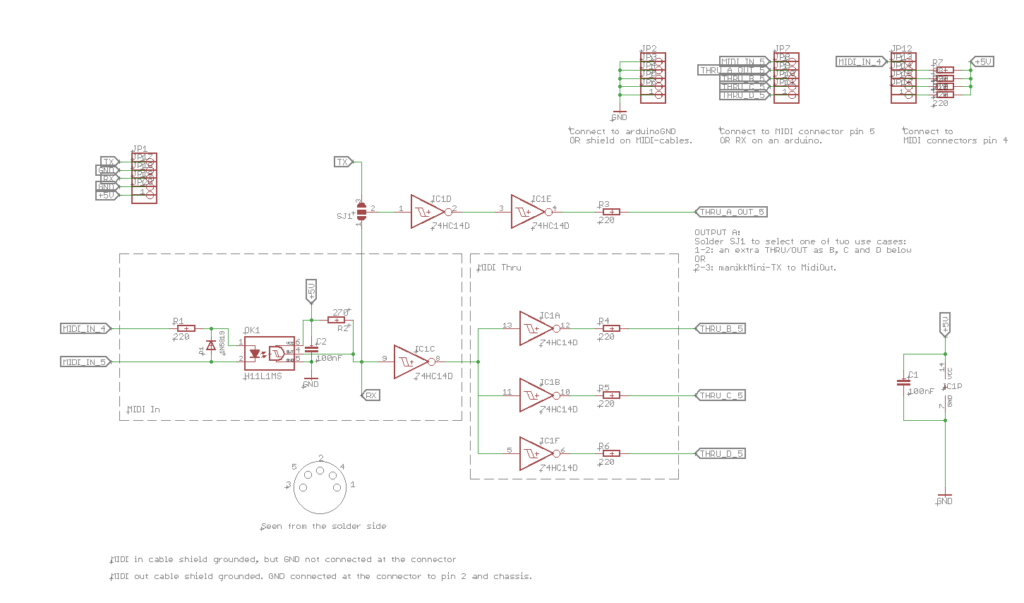
Schematic

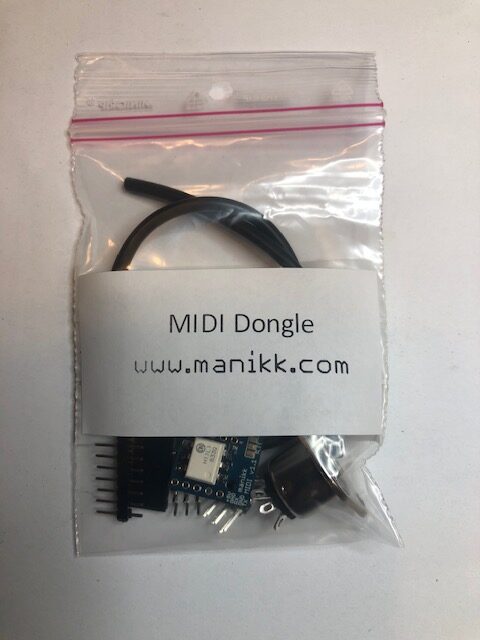
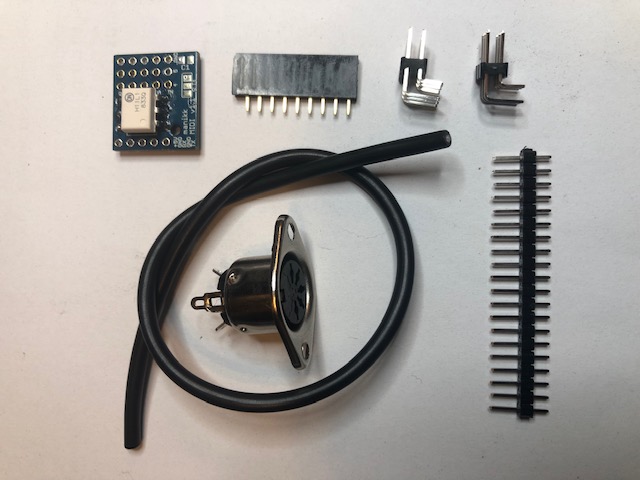
KIT contents
- MIDI dongle PCB with components pre-sodered and tested
- 1 female MIDI chassis connector (5 pol DIN)
- 1 cable (for making the MIDI cable)
- 9 position female header for creating 5+3 headers
- 20 pin male pinstrip
- 2 male pinstrip 2×3 pin
- Plastic zip bag

SJ1 solder switch
The SJ1 solder switch selects if you want output A to be:
- a MIDI output from the microcontrollers TX signal (solder a short between the middle pad and the pad nearest the version number).
- a fourth MIDI thru for the MIDI in (solder a short between the middle pad and the pad nearest the C1 symbol).
Use cases
NOTE! Only one MIDI cable is included. Depending on what you want to do, you may need to buy more MIDI connectors. See this page for a list of suppliers.

MIDI add-on for manikk modules
To use it as an add-on to for eaxmple the manikk ADSR, you need to solder it like the pre-built version.
This gives you MIDI in on the module you attach it to, and also gives you 3 MIDI thru output pins that can relay the MIDI signals to 3 other modules. The thru signals can be connected with female-female dupont cables.
One MIDI dongle can therefore serve 4 modules.
Connect the output pins marked “5” to the RX-inputs on the other modules and also connect a GND-cable for each module.
MIDI interface for your own Arduino/microcontroller projects
Connect the 5V, GND, RX and TX pins on the dongle to your Arduino.
Solder the SJ1 switch to get MIDI out or and additional MIDI THRU. See above.
THRU outputs B, C and D always relays whatever comes in on the MIDI in.
Connect the MIDI cable to the pin-strip positions 4, 5 and GND on the IN, OUT A, OUT B, OUT C or OUT D.
MIDI THRU Box
You can build a THRU-box with this dongle.
The THRU-box will have 1 MIDI input and 4 MIDI THRU outputs.
See above how to solder the SJ1 solder switch.
The little board requires a 5V power source (not included).
You can increase the number of THRU-outputs by chaining multiple midi-dongle boards. Connect one THRU-output of the first MIDI-dongle to the input of the second MIDI-dongle.
You need to add power supply, more connectors and maybe a box.
Price
290 SEK
Technical specifications
Dimensions
Width: 0 HPDepth: 16 mm
Current consumption
+5V: 2mAAdditional files, images and videos